

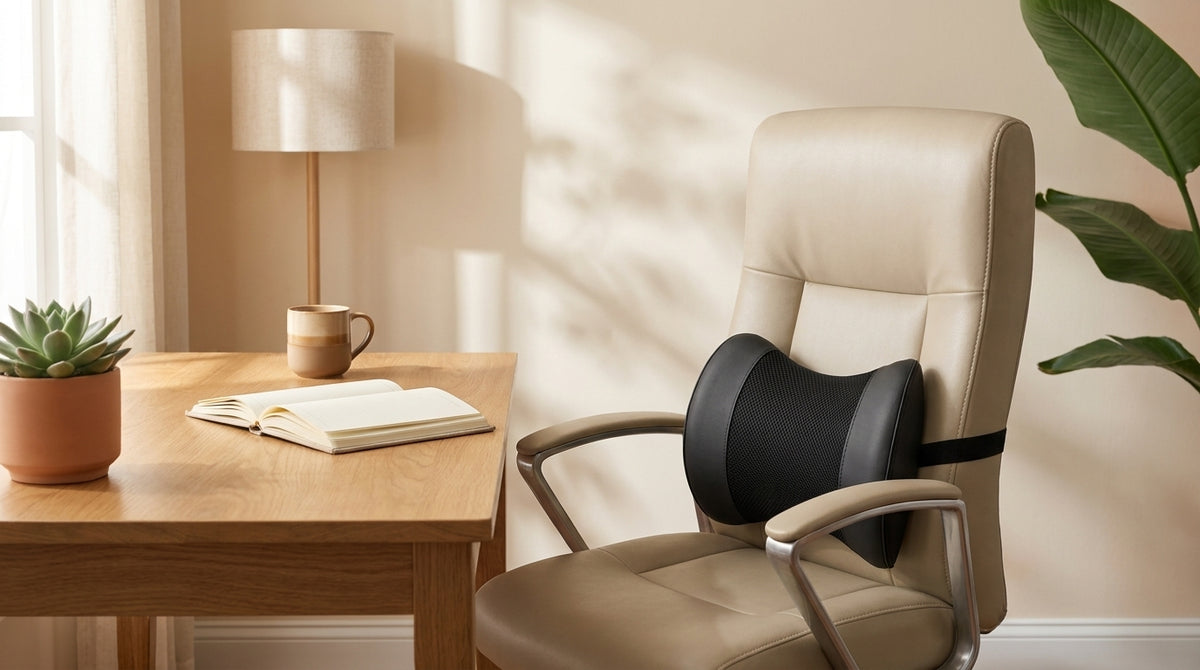
Most people who buy an external lumbar cushion strap it to their desk chair, sit down, and still feel tight by midday.
The problem is rarely the cushion. It is almost always where the cushion sits.
When placed even two inches too high, a lumbar cushion presses directly against the lower ribs and pushes the mid-back forward into an exaggerated arch. Placed two inches too low, it shoves the hips forward and causes the pelvis to tuck under, leaving the lower back rounded and completely unsupported.
Finding the exact sweet spot takes less than two minutes once you know the anatomical landmarks. Here is the practical, step-by-step guide to positioning your lumbar support on an office chair so your spine stays relaxed through long work sessions.
Why Your Lower Back Needs Support When Sitting
Your spine naturally features a gentle inward curve in the lower back called the lumbar lordosis. When you stand upright, your pelvis stays balanced and your leg muscles naturally help preserve this curve.
Sitting changes that dynamic immediately.
When your hips flex to 90 degrees, your pelvis naturally wants to rock backward into a posterior pelvic tilt. As the pelvis tilts back, the natural lumbar curve flattens out or reverses into a slump. Biomechanical research published in the International Journal of Occupational Safety and Ergonomics and cited by the National Institutes of Health shows that unsupported slumping significantly increases intradiscal pressure and strains the postural muscles along the spine.
According to ergonomic guidance from the Occupational Safety and Health Administration (OSHA), a supportive chair backrest should conform to the natural curvature of your spine and provide dedicated lumbar support. Without firm contact behind the lumbar spine, your postural muscles must work overtime to keep you upright. Within an hour or two, fatigue sets in, leading to the familiar dull ache in the lower back.
Soothe Note
An effective lumbar support does not push you forward into a military posture. Its only job is to fill the natural hollow between your lower back and the backrest so your muscles can stop clenching.
The 2-Minute Beltline Test: Where Should It Hit?
The single most common question about chair ergonomics is simple: exactly how high should the cushion sit?
The answer is your lumbar hollow, which centers right above your beltline (around the L3 to L5 vertebrae).
Use this quick physical test to lock in the height:
+-------------------------------------------------------------+
|               THE 2-MINUTE BELTLINE TEST                   |
+-------------------------------------------------------------+
|  1. STAND & LOCATE                                          |
|     Place your hands on your hips. Find the bony ridge of   |
|     your iliac crest. Follow that line around to your spine.|
|     The inward dip just above that line is your target zone.|
|                                                             |
|  2. SIT ALL THE WAY BACK                                    |
|     Slide your hips fully against the rear backrest.        |
|     Avoid perching on the front edge of the seat pan.       |
|                                                             |
|  3. POSITION THE THICKEST CURVE                             |
|     Fasten the cushion so its thickest outward contour fits |
|     directly into the inward curve just above your beltline.|
|                                                             |
|  4. CHECK YOUR SHOULDERS                                    |
|     Lean back. Your upper back and shoulder blades should   |
|     still rest comfortably against the chair without being  |
|     pushed forward into a slouch.                           |
+-------------------------------------------------------------+
- Find your iliac crest: Stand up and place your hands on your hips. The firm bony crest at your sides marks your iliac crest. Follow that level around to the center of your lower back. The small inward curve just above this line is where your lumbar spine requires support.
- Slide your hips fully back: Sit down in your chair and make sure your bottom is all the way against the backrest. A common error is sitting halfway forward on the seat pan and leaning backward. This creates a gap that forces you to slouch regardless of where the cushion is.
- Align the thickest contour: Adjust the strap so the thickest, most supportive part of the cushion fills the small of your back. It should rest between your waistband and your lower ribs.
- Verify upper back contact: When you relax back against the chair, your shoulder blades should still make light, natural contact with the upper backrest. If your chest is pushed so far forward that your upper back cannot touch the chair, the cushion is either too thick or positioned too high.
4 Common Lumbar Placement Mistakes (and the Fixes)
If your chair setup still feels uncomfortable after adding a cushion, check for these four frequent placement mistakes:
1. The "Kidney Push" (Too High)
- What happens: The cushion rests against your mid-back or lower rib cage.
- How it feels: Your upper spine feels forced into an arch, your ribs feel compressed, and your lower back remains suspended in empty air without support.
- The fix: Lower the cushion by two to three inches until you feel the pressure release from your ribs and settle squarely into the small of your back.
2. The "Hip Shove" (Too Low)
- What happens: The cushion rests directly behind your tailbone or the back of your pelvis.
- How it feels: The cushion shoves your hips forward on the seat, causing your pelvis to tuck under. Your lower back is forced to round backward over the top of the cushion.
- The fix: Raise the cushion so its bottom edge clears your seat cushion by roughly two to three inches, allowing your hips to slide fully back.
3. The Forward Perch (Too Thick)
- What happens: Using an over-stuffed decorative pillow or a support that is too deep for your chair.
- How it feels: You are pushed forward onto the front half of the seat cushion, cutting off circulation behind your thighs and preventing your feet from resting flat.
- The fix: Choose a dedicated contoured memory foam cushion with an ergonomic taper rather than a bulky bed pillow.
4. Cushion Sag
- What happens: Elastic straps stretch over time, allowing the cushion to slide down to the seat base whenever you stand up.
- How it feels: Every time you sit down, the cushion rests behind your hips rather than your lower back.
- The fix: Look for a support with sturdy adjustable dual straps or non-slip backing that stays locked at your chosen height.
The Complete Desk Comfort Triangle
A well-placed lumbar support is the anchor of your sitting setup, but it works best when the rest of your chair is dialed in. Clinical guidelines from the Cleveland Clinic emphasize establishing a neutral sitting posture where joints rest in balanced alignment.
       HEAD & NECK
       Ears stacked directly over shoulders, gaze level
             |
             v
       [UPPER BACK]  --> Resting lightly against backrest
             |
             |   <-- LUMBAR SUPPORT (Beltline level, inward curve)
             v
       [PELVIS/HIPS] --> Hips all the way back, thighs parallel (90-100°)
             |
             v
        [KNEES/FEET] --> 2-3 finger gap behind knees, feet flat on floor
- Seat Height: Adjust your seat pan so your feet rest flat on the floor with your knees bent at approximately 90 to 100 degrees. If raising your chair to match desk height leaves your feet dangling, use a sturdy footrest to prevent pulling on your lower back.
- Seat Depth: Ensure there is a two-to-three-finger gap between the front edge of the seat cushion and the back of your knees. This protects healthy circulation to your lower legs.
- Recline Angle: Avoid sitting bolt upright at a rigid 90-degree angle. Spinal biomechanics research demonstrates that reclining the backrest slightly to 100 or 110 degrees reduces intradiscal pressure on the lumbar spine.
- Armrest Position: Set armrests so your shoulders remain relaxed and down, with elbows resting lightly at 90 degrees.
Soothe Note
If you often transition between a desk chair and a vehicle, take note of your strap settings. Car seats are often deeply bucketed, which changes your hip angle and requires a slightly different cushion height than an upright office chair.
Memory Foam Density vs. Built-In Support
Many standard office chairs come with a hard plastic flap or a thin mesh ridge labeled as lumbar support. While better than nothing, built-in supports often lack vertical adjustability or sufficient depth to conform to different body types.
An external support crafted from high-density memory foam provides a distinct ergonomic advantage:
- Responsive Contouring: High-density memory foam gently softens with body heat, molding to the unique shape of your lumbar curve instead of digging into sensitive pressure points.
- Firm Core Stability: Unlike soft poly-fill batting that collapses completely under body weight, quality memory foam maintains its supportive structure through hours of continuous sitting.
- Breathable Fabric: A breathable cover, such as 4D air mesh, allows continuous airflow so heat does not build up along your back during long afternoons.
For desks and vehicles where factory backrests lack sufficient contour, pairing your chair with a dedicated support like the Memory Foam Lumbar Support Pillow gives you dependable, adjustable lower back alignment that stays firmly in place.
The 45-Minute Micro-Reset
Even with the most refined ergonomic setup, the human spine is built for movement. Remaining seated in one static posture for hours on end eventually leads to stiffness.
Build this gentle 30-second micro-reset into your workday every 45 to 60 minutes:
- Stand and Reach: Stand up tall. Place both hands gently on your hips and take a slow, deep breath in while looking upward toward the ceiling.
- Gentle Standing Extension: Keeping your knees soft, gently ease your hips slightly forward and let your upper torso lean back a few inches. Hold for three seconds, then return upright. Repeat three times.
- Reseat and Align: When you sit back down, slide your hips all the way to the rear of the chair, verify that your lumbar cushion is snug in the curve above your waistband, and resume working with relaxed shoulders.
Taking consistent micro-breaks keeps your spinal discs hydrated and ensures your muscles stay supple from your first morning email to the end of the day.
Everyday Comfort Checklist
Keep these practical rules in mind whenever you sit down to work:
- Slide hips all the way back: Never leave a gap between your lower pelvis and the chair.
- Center on the beltline: Align the thickest curve of the support with the inward dip just above your waistband.
- Keep upper back relaxed: Make sure your shoulder blades rest against the chair without being pushed forward.
- Recline slightly: Aim for a 100 to 110-degree backrest angle to reduce disc loading.
- Keep feet flat: Use a footrest if your feet do not rest firmly on the floor.
- Move every hour: Take 30 seconds to stand and change positions throughout the day.


